Radon Mitigation Explained: Systems Costs and How Long Installation Takes
Radon is one of those home hazards that’s easy to ignore, because you can’t see it, smell it, or taste it. It can build up indoors, posing long-term health risks. That’s why many homeowners start with radon testing.
Next, consider the following questions: What is the purpose of a mitigation system? What is the cost of the system? How long will the installation process take?
The following guide makes understanding radon mitigation easy. It explains the testing process, selecting a mitigation system, installing the system, and the associated costs.
What radon mitigation is (and what it isn’t)
Radon is a naturally occurring radioactive gas that can seep into a home through cracks and openings in foundations and slabs. The goal of radon mitigation is simple: reduce indoor radon levels by venting the gas safely outside before it accumulates in living spaces.
Most homes use a method called active soil depressurization (ASD). A pipe is inserted through the slab or foundation area and connected to a fan that pulls radon-laden air from beneath the home and exhausts it above the roofline.
What mitigation does not involve:
- Not a “crack-seal.” Crack sealing may help, but on its own, it rarely reduces radon to acceptable levels.
- This is not a plug-and-play product. The right design depends on the home’s foundation, layout, and radon starting level.
- Not the same as water treatment. If radon is in well water, you may need radon water filtration in addition to (or instead of) air mitigation.
Radon mitigation systems: the common options
If you like to know what’s coming, here’s a handy guide for homeowners.
Sub-slab depressurization (most common)
It is found in slab-on-grade homes and many homes with basements. A contractor digs a small suction pit under the concrete floor. The air is vented outside through pipes, and a fan runs continuously. This lowers the pressure beneath the slab, so air is sucked away from the home instead of into it.
Crawl space mitigation
Crawl spaces often use a sealed membrane over the soil, along with a fan-and-pipe system to vent gases beneath it. This can be very effective, especially when the crawl space is a major entry path.
Radon in water solutions
If you have a private well, consider water testing to check for radon and other contaminants. When radon is present in water, radon water filtration can reduce radon released into indoor air during showering, laundry, and dishwashing.
It’s also common for homeowners to bundle water-related improvements at the same time, such as water filtration systems, water softener systems, reverse osmosis systems, or PFAS filtration systems based on test results.
Radon mitigation explained: step-by-step from test to finish.
If you like to know what’s coming, here’s a handy guide for homeowners.
Step 1: Start with radon testing
Short-term tests serve as quick screening methods, whereas long-term tests provide accurate measurement of typical performance standards. A professional can help you choose the right approach and interpret results.
Tip: Test the lowest livable level of the home (often the basement), even if you don’t spend much time there. Radon levels can be higher downstairs.
Step 2: Confirm whether mitigation is recommended
In the U.S., many homeowners use the EPA action guideline of 4.0 pCi/L as the point at which mitigation is recommended, though reducing levels below that level when feasible is often the goal.
Step 3: Get a home-specific system design
The installation expert will look into foundation types, sump pits, drain tiles, crawl spaces, and piping options. The installation cost and time factor are established at this point.
Step 4: Installation day, what happens in your home
Installation usually includes:
- Establishing a small vacuum point on the slab (or preparing the crawl space)
- Installing PVC piping (usually through an area where utilities are stored, a garage, or the wall)
- Radon vent installation (typically found outside or in an attic space, but not indoors)
- Blocking all visible areas of entry as a secondary step
- Installation of a system indicator (an easy-to-read flowmeter that indicates airflow)
Drilling sounds and minimal dust will be encountered during installation, but professional installation companies will try to maintain cleanliness at all times.
Step 5: Post-mitigation radon testing
After installation, you’ll retest to confirm the system is working and radon levels have dropped. This step matters; don’t skip it. It’s the proof your investment is doing its job.
How long does radon mitigation installation take?
Radon-reduction systems may be installed in many homes in a single day. However, installation time varies depending on the situation.
Average times:
- Simple sub-slab system: often 4–8 hours
- More complex foundations or long pipe runs: 1–2 days
- Crawl space with membrane work: commonly 1–2 days
- Radon water filtration: timing depends on plumbing access, but plan for several hours to a full day
Also factor in scheduling and follow-up testing time. Even if the install is quick, you may be making decisions over a week or two from the first test to the final confirmation test.
Radon mitigation cost: what you’ll pay and why it varies
Radon removal prices are determined by the type of construction of your house and the type of venting system required to extract radon from the correct place effectively. Whereas many homeowners seek a single fixed figure, a better strategy is to understand the factors that determine prices.
Common factors that affect pricing are:
- Type of foundation: basement, slab, crawl space, or any combination of these types.
- Complicated piping system: long pipe lengths, numerous bends, or pipes located in difficult places.
- Number of suction points: Sometimes several suction points are required in a house to get satisfactory results.
- Electrical work: adding a dedicated outlet for the fan if needed
- Exterior vs. attic fan placement: placement affects labor and materials
- Finishing considerations: cosmetic routing choices or special sealing needs
If you’re comparing estimates, ask what the design includes, where the fan will be located, how the exhaust will terminate, and whether post-installation testing is included.
Actionable checklist: how to prepare for installation and keep the system working
After making the decision, just a bit of preparation goes a long way on installation day and ensures that you’ll get sustained results.
- Access to the basement, crawl space, sump, and electrical panel.
- Inquire about the layoutI of the pipe runs before the project begins, if appearance is important to you.
- Maintain windows/doors in standard use conditions while tests are conducted.
- Check the system indicator occasionally (your installer will show you what “normal” looks like).
- Retest periodically or after major home changes, such as finishing a basement or replacing HVAC equipment.
It is important to note that radon reduction is only part of making your house healthier. If you have other problems in your home, such as indoor air quality or moisture issues, services like mold testing and remediation may be needed, particularly after water damage from leaks or a wet basement.
When radon isn’t the only issue: related problems homeowners often uncover
Sometimes radon testing occurs as part of a more extensive “What is happening to my house?” investigation, either after purchasing the property, after remodeling, or after an event that affects the interior environment.
Here are a few situations where homeowners often address multiple concerns:
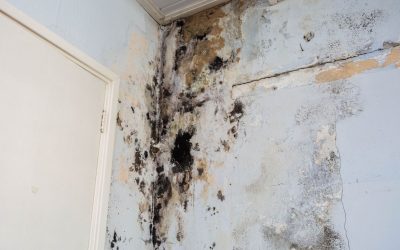
- After a storm or leak, moisture can cause mold to grow. This underscores the importance of mold testing and remediation, as well as radon testing.
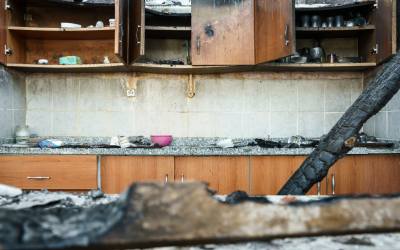
- After a fire, indoor air quality may be affected, and services such as fire damage restoration and smoke odor removal focus on returning the home to safe, livable conditions.
- After a sewage backup, raw sewage cleanup is critical for safety and sanitation.
- After a serious contamination event, biohazard cleanup or crime scene cleanup may be required to properly remediate affected areas.
- During a “whole-home refresh,” improve drinking water with water filtration systems, reverse osmosis systems, water softener systems, or targeted PFAS filtration systems based on water testing.
Different problems call for different solutions, but the common thread is the same: test first, then fix the right thing the right way.
Radon mitigation doesn’t have to feel mysterious. With solid radon testing, a home-specific system design, and post-install confirmation, most homeowners can quickly reduce radon with an installation that often takes a day. If you treat it like any other home system decision, understand the options, ask clear questions, and verify the results, you’ll end up with a safer home and lasting peace of mind.
To stay updated with us, please follow our Instagram page.